How to master the Headstand (Sirsasana)
15 Apr 2020 14:13PM
by
User Not Found
By Alexandra Black, Group Exercise Manager, Virgin Active.
“Do whatever feels nice in your body to end practice!” says the yoga teacher and you’re wondering what that means, Then you look around the room and some people are standing on their heads – what? Why are they doing this and how can I?
Sirsasana, or headstand, can be a great way to end the practice as it is said to calm down the whole body – relieving stress and anxiety or other psychological ‘disturbances’. There are other said benefits like improved lung function as the position of your diaphragm changes, as well as improvements on the reproductive and glandular systems. When performing headstand, always warm up properly so that you are prepped for the pose and ensure that you are focusing on the task at hand. And, of course, be prepared to have a laugh as you will undoubtedly fall at some point (and this is okay!).
Warm up safely:
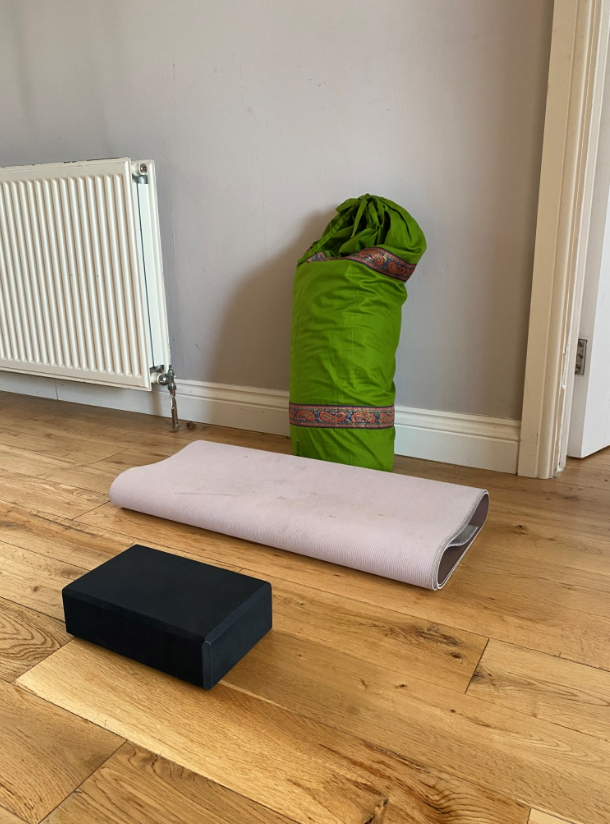
It is really important to warm up the body before performing headstand. A usual 30-60-minute yoga practice will do the trick, but if you’re looking for something to focus on, try the below poses.
Shoulders: dolphin pose (ardha pincha mayurasana):
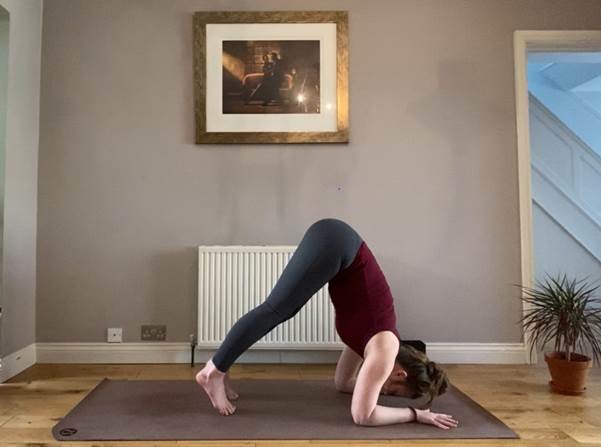
With your forearms on the ground, ensure your shoulders are over your elbows. Walk your feet in as much as you can. Hold here for five to ten breaths (the longer the better!).
Core: boat pose (navasana):
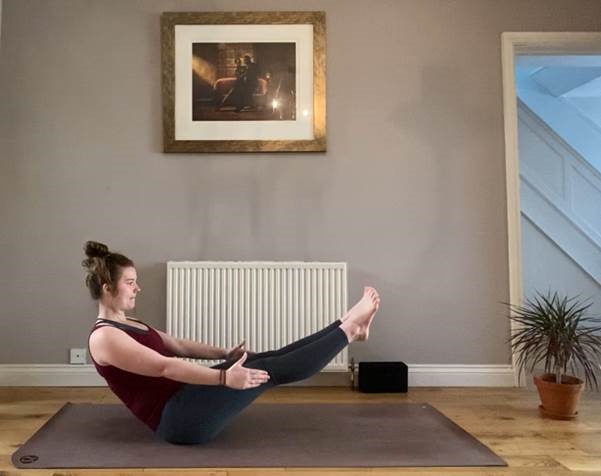
With your knees bend, have your feet in the air and lean back. If you’re feeling strong here you can straighten the knees.
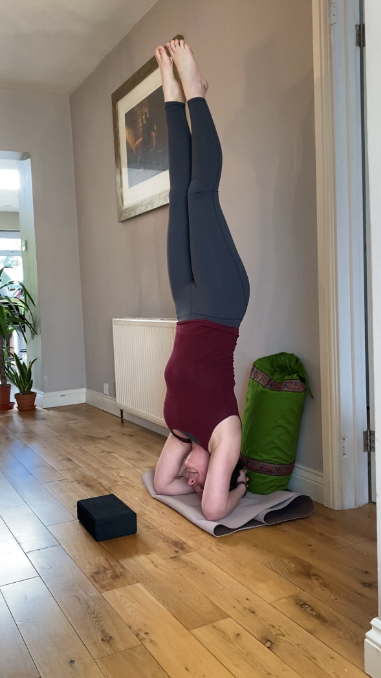
Headstand position with feet on block:
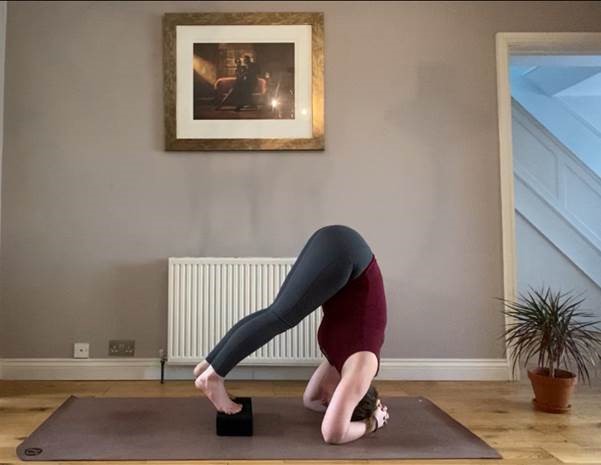
Come into the headstand position with your forearms behind your head and walk the feet in as far as you can. Prop your feet up on a block (or book) and hold here for at least ten breaths. You’re getting used to the shape here and building strength while you’re at it.
How to enter the pose:
Find a wall and place a pillow against it to support your back – this will help support the shape you’re trying to create. For extra support, you can roll your yoga mat under your head and arms (I find this gives you more grip).
Place your forearms to the floor with your hands behind your head. Walk your elbows in – the closer they are the stronger your foundation. Bring your hips to the sky and walk your feet in.
With a little tuck jump, bring your knees into your chest (think core on and glutes squeezing). Your back may move and rest on the pillow behind you and this is okay – this is why we have it. If you’re struggling to get here, find a friend to hold your hips as you jump so you can feel the weight distribution.

Once you’re here, if you feel stable, start bringing your legs up to the sky. If you fall back, the wall is there to support you, but try to not to use it. Use your muscles. You want to be in the posture with the weight in your arms, and your head supporting. Over time, you may be able to bring weight into your head with your arms to support, but this takes a lot of neck strength and training.
Try and come down with the same control as you entered. The less jumping and jarring, the better for our neck and spine.
When you come down from your pose, be sure to come into a counter posture. The best counter posture for headstand is savasana. If you’re resting between sets, come into a close-knee child’s pose. If you’re ready to rest completely, lay yourself down on your mat for three to five minutes for the spine to relax.
Progression:
Once you’ve got the entrance and exit of the pose, then you can remove the pillow, and then move away from the wall. It is a good idea to move from the wall to outside on the grass as the ground will pad you should you fall down.
It is probably a good time to mention that you will fall down at one point or another. With any inversion, learning how to fall out of the pose is almost as important as the pose itself. In this case, try and bring the feet to the ground first.
The biggest challenge for inversions is fear, and while headstand is one of the most achievable legs-in-the-air inversions – don’t push yourself too far. Remember that an inversion is anything where your buttocks is higher than your heart – downward facing dog is an inversion! So, if you’re not ready, don’t push yourself.
Good luck on your inversion journey and show us your pics at
@virginactiveuk on Instagram. We’re always here for you should you need us.